Project details
Skill
Cost
Estimated Time
We may be compensated if you purchase through links on our website. Our team is committed to delivering honest, objective, and independent reviews on home products and services.
Although you can purchase a pre-made floating shelf, making your own is well within the skills of most DIYers. Floating shelves are made up of two parts—a simple cleat that’s attached directly to the wall and a hollow box that slides snugly over the cleat. We’ll walk you through each step for making and installing a floating shelf that’s 24 inches long and 8 inches deep.
Cut List for Floating Shelves
Before you begin, gather the following materials:
- 1 x 8 board: to make the shelf top and bottom
- 1 x 2 board: to make the spacer blocks
- 2 x 2 board: to make the cleat
- 1 1/2-inch wood screws: to assemble the shelf and spacer blocks
- 2 1/2 inch wood screws: to assemble the cleat and attach it to the wall
- Wood glue
- Sanding discs or sanding sponge
Tools
You’ll need a stud-finder and level as well as the following power tools:


Watch the video above, use my cut list below, and view the step-by-step instructions below on how to make a floating shelf.
Steps for Building a Floating Shelf
For this DIY floating shelf project, I’m using stock boards from the home center, a miter saw to cut them to length, and a drill/driver to assemble the pieces with screws and wood glue. I’ll also be using a sander to smooth my edges, but you can also just use a sanding sponge.
Step 1: Cut the Shelf to Length

Cut two pieces from the 1 x 8 boards to the width of the shelf, which for this project is 24 inches.
Step 2: Size the Spacers

Using the cut list above, cut the 1 x 2 front and side pieces to length.
Step 3: Prep the 1 x 2 Spacers

With the shelf piece cut, we’re ready to assemble the shelf box. First assemble the 1 × 2 pieces by drilling two pilot holes through the longer piece into each shorter pieces.
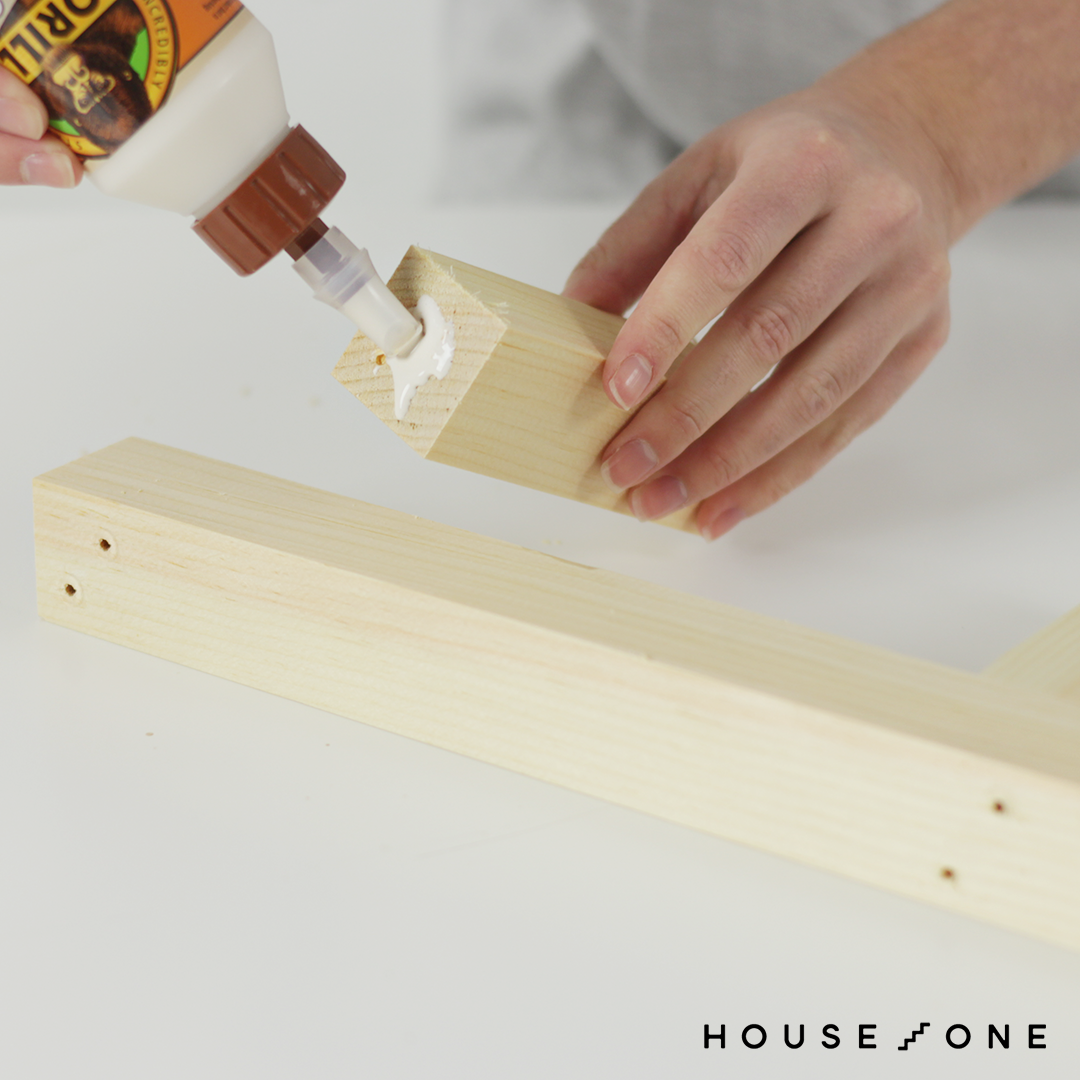
Step 4: Apply Glue

Apply wood glue to the ends of the shorter 1 × 2 pieces.
Step 5: Secure the Spacers

Drive 1 1/4-inch wood screws through the longer 1 × 2 pieces and into the ends of the shorter 1 × 2 pieces to hold the pieces in place.
Step 6: Lay out the Shelf Parts
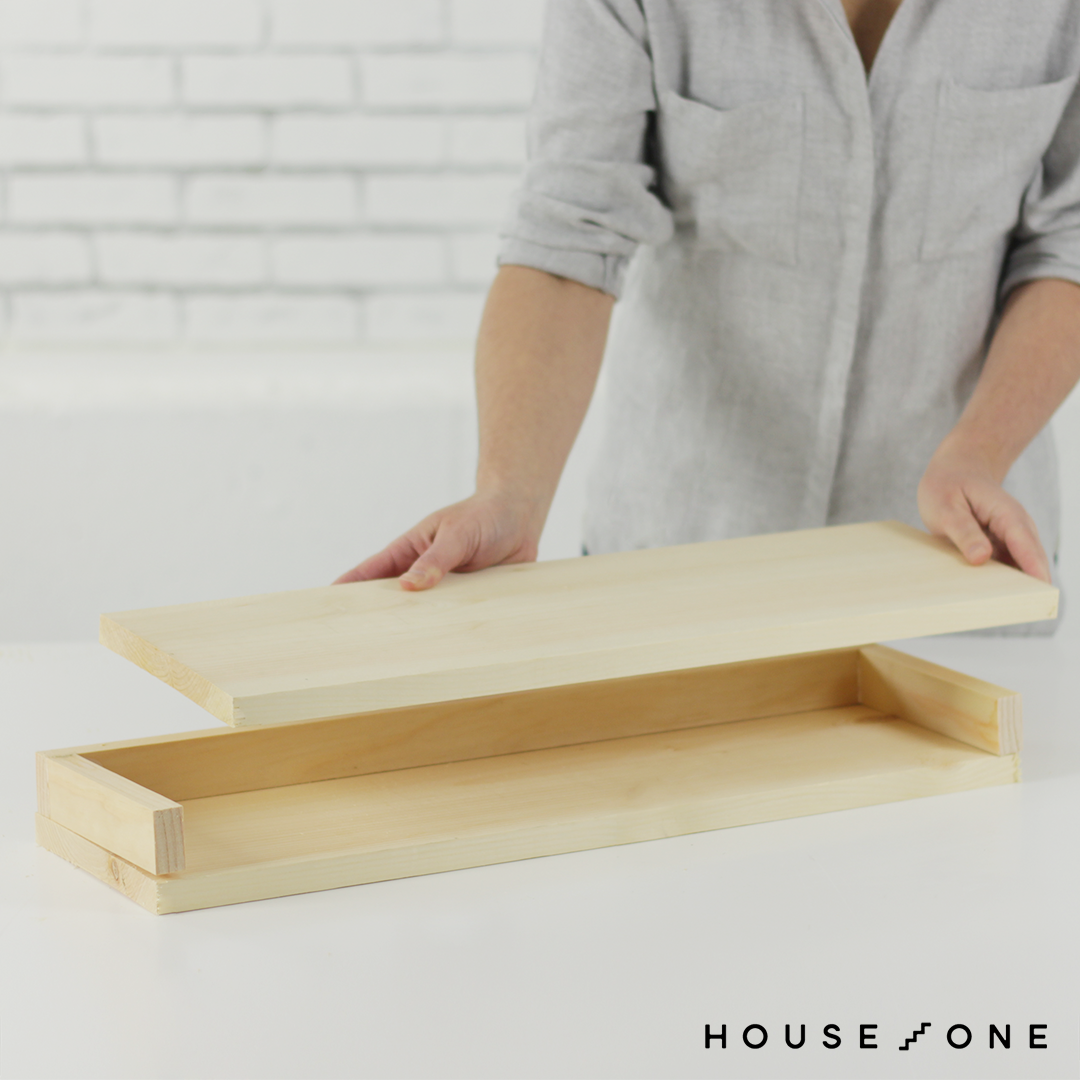
Sandwich the assembled 1 × 2’s between the 1 × 8 top and bottom of the shelf.
Step 7: Drill Pilot Holes

To hold the layers together, first drill pilot holes through the shelf’s top and bottom pieces and into the 1 × 2’s.
Step 8: Apply the Glue

Apply a coat of wood glue between the layers.
Step 9: Assemble the Shelf Parts

Using a drill/driver, drive 1 1/4-inch wood screws through the shelf’s top and bottom and into the 1 × 2’s to hold the layers securely in place.
Step 10: Cut the Cleat Pieces

Lastly, to make the cleat that will attach directly to the wall and hold the shelf in place, cut the 2 × 2 pieces to size (see cut list above).
Step 11: Prep the Cleat for Assembly

Attach the 2 × 2 legs to the cleat by first drilling two pilot holes through the cleat and into each leg.
Step 12: Assemble the Cleat
Apply wood glue to the end of each leg, and then drive 2 1/2-inch wood screws through the cleat and into each leg.
Step 13: Mount the Cleat on the Wall

To hang the shelf, first mark its location. It’s best to screw the cleat into a wall stud, which you can locate with a stud finder. If that’s not an option, use drywall anchors to add strength. Position the cleat on the wall. Use a small level to adjust the placement. Screw through the cleat and into the wall with 2 1/2-inch screws.
Step 14: Place the Shelf Box on the Cleat
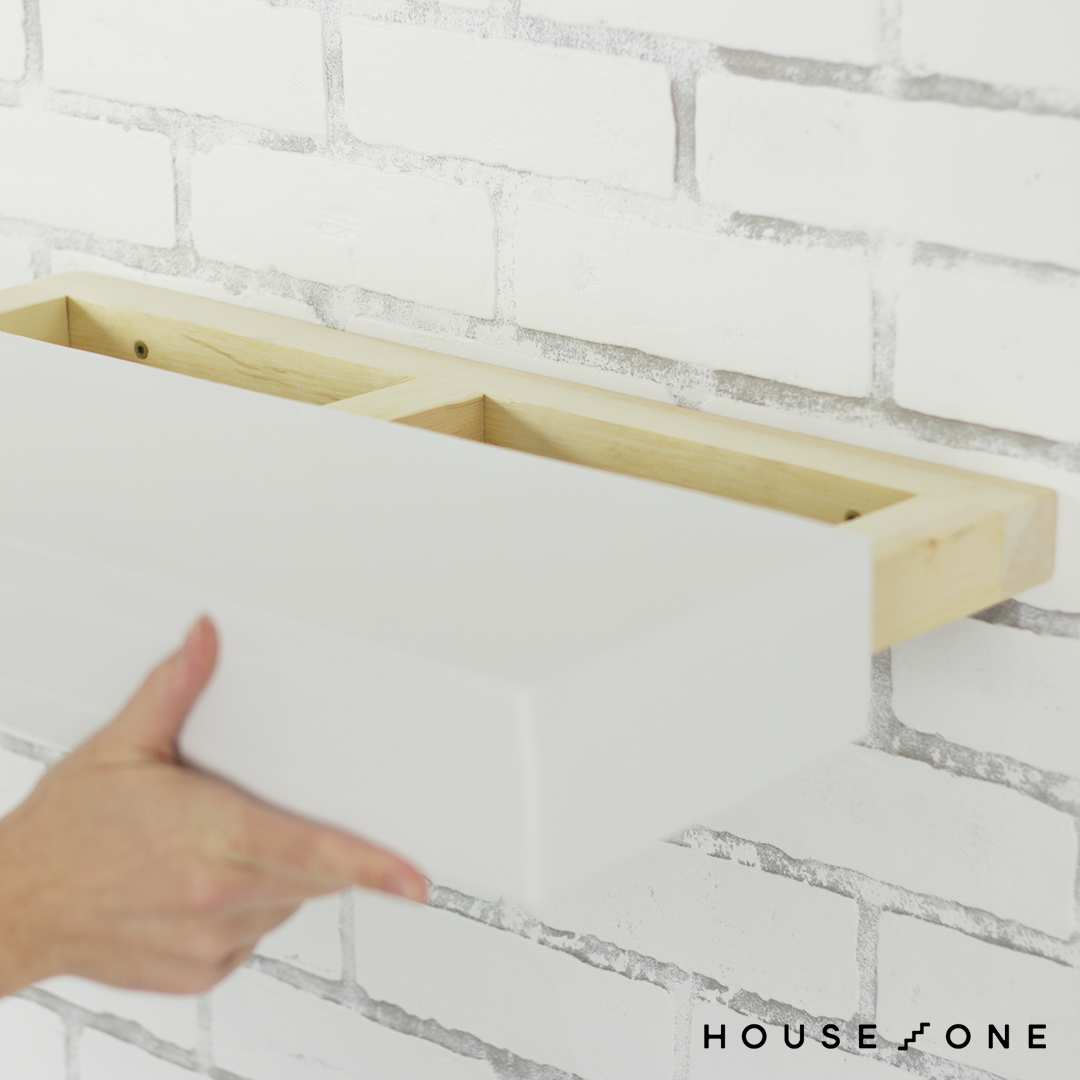
Slide the shelf box over the cleat. Drive one final screw or finish nail through the shelf and into the cleat to hold it in place. Now step back and admire your new wooden floating shelf!
Our Conclusion
While floating shelves like these aren’t designed to hold heavy objects like books, they’re perfect for displaying keepsakes, framed photos, and other mementos. You can paint or stain these shelves to match your décor—just remember that this will be much easier to do before you install them.