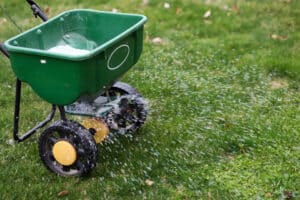
More efficient than traditional seeding and more affordable than laying sod, hydroseeding is the use of a moisture- and nutrient-rich soil bed to encourage rapid and even growth. Although the name sounds high-tech, you can hydroseed your lawn yourself or hire a professional lawn care company.
If you’re on a budget, you can find a hydroseeding starter kit on Amazon or possibly at your local garden store. However, most people recommend hiring a professional lawn care company in order to benefit from its equipment and expertise.
Find Lawn Help
- See our list of top lawn care companies based on in-depth research.
- Select the company that best meets your needs.
- Get a free, no-obligation quote for your home.
Get a Quote From Lawn Professionals Near You
Compare quotes from local pros
Clicking “Get Your Estimate” submits your data to Home Service Quotes, which will process your data in accordance with the Home Service Quotes Privacy Policy.

Lime Soil Amendment

Lawn Fertilization
How Does Hydroseeding Work?
Simply put, hydroseeding is a technique that spreads a specialized grass “slurry” evenly over bare ground to grow grass quickly and prevent soil erosion. This slurry is made up of grass seeds, mulch, water, fertilizer, biostimulants, and occasionally green-tinted dye.
It’s a clever mixture because the fertilizer boosts growth while the mulch bonds the seeds to the soil, protects them from the elements (like wind or too much sunlight), and ultimately adds extra nutrients by decomposing on the growing grass.
If you haven’t heard of hydroseeding, it’s possible you’ve heard of hydromulching or hydraulic mulch seeding instead. They’re the same terms for a proven process that’s been around for more than a half-century.
Hydroseeding Basics
Hydroseeding is the middle-of-the-road approach in terms of cost, labor involved, and growth rate compared to sod or regular seeding. However, hydroseeded lawns are often considered the most attractive once they’re well-established. Traditionally seeded lawns can grow in patchy, and lawns made of sod might have visible “seams” or gaps. Hydroseeding spreads the slurry evenly for a more uniform look.
What Are the Pros and Cons of Hydroseeding?
Pros
- Customizable seed blend
- More efficient than traditional seeding
- More uniform look than laying sod or traditional seeding
Cons
- Intensive watering is required initially
- DIY hydroseeding is less effective than DIY sod or DIY traditional seeding
How To Hydroseed
The process of hydroseeding, whether you tackle it yourself or hire a professional, involves the following steps. For the best results, hydroseeding should be done between March and October. The rest of the process is broken down in the dropdown sections below:
Step 1: Select Your Seeds
Unlike laying sod, with hydroseeding you can use a custom grass blend made up of different species, each with unique beneficial traits. Select your blend based on your local climate and the characteristics you’re looking for, like heat resistance, disease resistance, or drought resistance.
If you hydroseed yourself, you can ask your local garden center about which grass blend will work best. If you hire a professional, they can guide you through the decision and provide the blend.
Step 2: Perform a Soil Test
Soil tests are key, no matter what type of seeding you choose. You need to make sure your soil has the right pH: not too acidic and not too alkaline. Most grasses thrive at a soil pH between 6.5 and 7. You can adjust your soil pH as needed with lime amendments, organic material, or sulfur, depending on its level.
If you’re taking the DIY route, you can buy a commercial test or purchase an at-home kit, then send a sample to a company or university to analyze. Or, the professional lawn care company you hire to hydroseed will perform the test.
Step 3: Clear Off the Ground
Unlike laying sod, you should only hydroseed on bare soil. Pull any weeds and remove any debris to give your grass a clean slate.
Step 4: Grade the Soil
Next, you should create a grade about 2.5–3 inches below the ultimate grade you want. This will keep the slurry from reaching your house or any other structures, where it could cause moisture-related damage.
Step 5: Apply Topsoil and Compost
Start things off right by applying a 2-inch blend of topsoil and compost to give your lawn the nutrients it will need to grow strong and lush.
Step 6: Regrade the Soil
Take the time to regrade, making sure your soil is completely smooth. The smoother the surface, the better.
Step 7: Prep the Hydroseeder
Add your special blend to your hydroseeder, turning on the agitator to create a thoroughly mixed slurry. Professional lawn care companies will have commercial-grade hydroseeders, but you can rent or purchase your own.
Step 8: Spray
Finally, the fun part. Spray the hydroseed across the soil with your hydraulic machine.
Step 9: Conduct Regular Maintenance
After this, it’s all about maintenance. For the first two months after hydroseeding, you’ll need to take special care to make sure your lawn is moist. Watering two to three times a day for the first few weeks is important, and you can gradually water less (but more than usual) the next six to seven weeks. It’s important that no one walks on the lawn during this time—kids and furry friends included.
With hydroseeding, you may see grass start sprouting as soon as seven to 10 days, depending on the grass type (for instance, rye grass will germinate faster than Bluegrass). You can start mowing after four weeks.
Downsides?
- Hydroseeding requires intensive watering initially.
- DIY hydroseeding is less effective than DIY sod or DIY traditional seeding.
How Does Hydroseeding Compare to Laying Sod?
Laying sod, traditional seeding, and hydroseeding all have their unique perks and drawbacks. Let’s take a look at laying sod and traditional seeding.
Sod
Sod is the fastest but most expensive, way to establish a lawn. According to Lawnlove.com, sod costs $0.31–$0.82 per square foot, compared to just $0.06–$0.20 per square foot for hydroseeding. For a 1,000 square-foot lawn, it may be $250–$620 more expensive to lay sod rather than hydroseed.
Here are some pros and cons of sod:
Pros
- Affordability
- You can lay it any time of year
- Requires less maintenance
- Fully rooted lawn in just a few weeks
Cons
- Expensive
- Limited grass seed options
- Can be more susceptible to disease
Seeding
Traditional seeding is cheaper than sod or hydroseeding. However, this method takes more time than hydroseeding and can take from six to 10 weeks for the lawn to become fully established and usable. The time of year you seed your lawn depends on whether you live in a cool grass, warm grass, or transition zone.
Here are some pros and cons of seeding:
Pros
- Affordability
- You can use many different grass types
- Good for very large lawns
Cons
- Longest germination time
- Need to be specific about the time of year
Is Hydroseeding Worth It?
Ultimately, the seeding method you choose comes down to your priorities. Do you want an instant lawn, and money is no object? Sod may be your solution. If you’re on a tight budget but have time in spades, traditional seeding could be just what the doctor ordered. Both of these options are more DIY-friendly than hydroseeding.
If your needs and preferences fall somewhere in the middle, consider hydroseeding. With this method, you can get a hardy, healthy lawn in two months made up of your custom grass blend with minimal effort and cost. We recommend contracting with a professional lawn care company to see the best results.
FAQs About Hydroseeding
What are the disadvantages of hydroseeding?
The two biggest disadvantages of hydroseeding are that this method requires intensive watering initially, and DIY hydroseeding is less effective than DIY sod or DIY traditional seeding.
Can you hydroseed over an existing lawn?
No, you need bare ground to hydroseed. You should pull any weeds and remove debris to give your grass a fresh start.
Is hydroseeding worth the cost?
Hydroseeding can be worth the cost if your needs and preferences fall somewhere in between sod, which is more expensive but delivers an instant lawn, and traditional seeding, which is cheaper but takes more time both upfront and in the long run.


