Every DIY enthusiast or professional carpenter can benefit from a good combination square. Used for tasks like measuring, marking, and checking angles, combination squares come in various sizes and styles, with each type catering to different needs.
In this guide, This Old House general contractor Tom Silva shares essential insights on how to select and use combination squares effectively. He and host Kevin O’Connor explore everything from the square’s anatomy to its many uses, such as framing, metalworking, and wood layout.
Whether you’re choosing a compact 6-inch model or a robust 24-inch square, this guide covers key aspects to look for, including size, materials, and extra features like built-in levels or scribing tools. We’ll break down the top choices available, along with expert tips to help you maximize your combination square’s utility.
Read on to find the best options and learn techniques to get the most precise measurements in your next project.
Anatomy of a Combination Square
Combination squares come in various sizes: 6 inches, 12 inches, 18 inches, and 24 inches. But regardless of size, they all have a few standard parts.
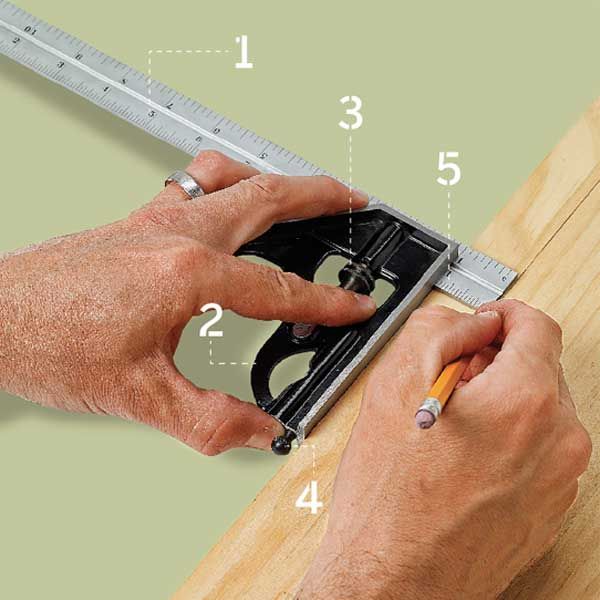
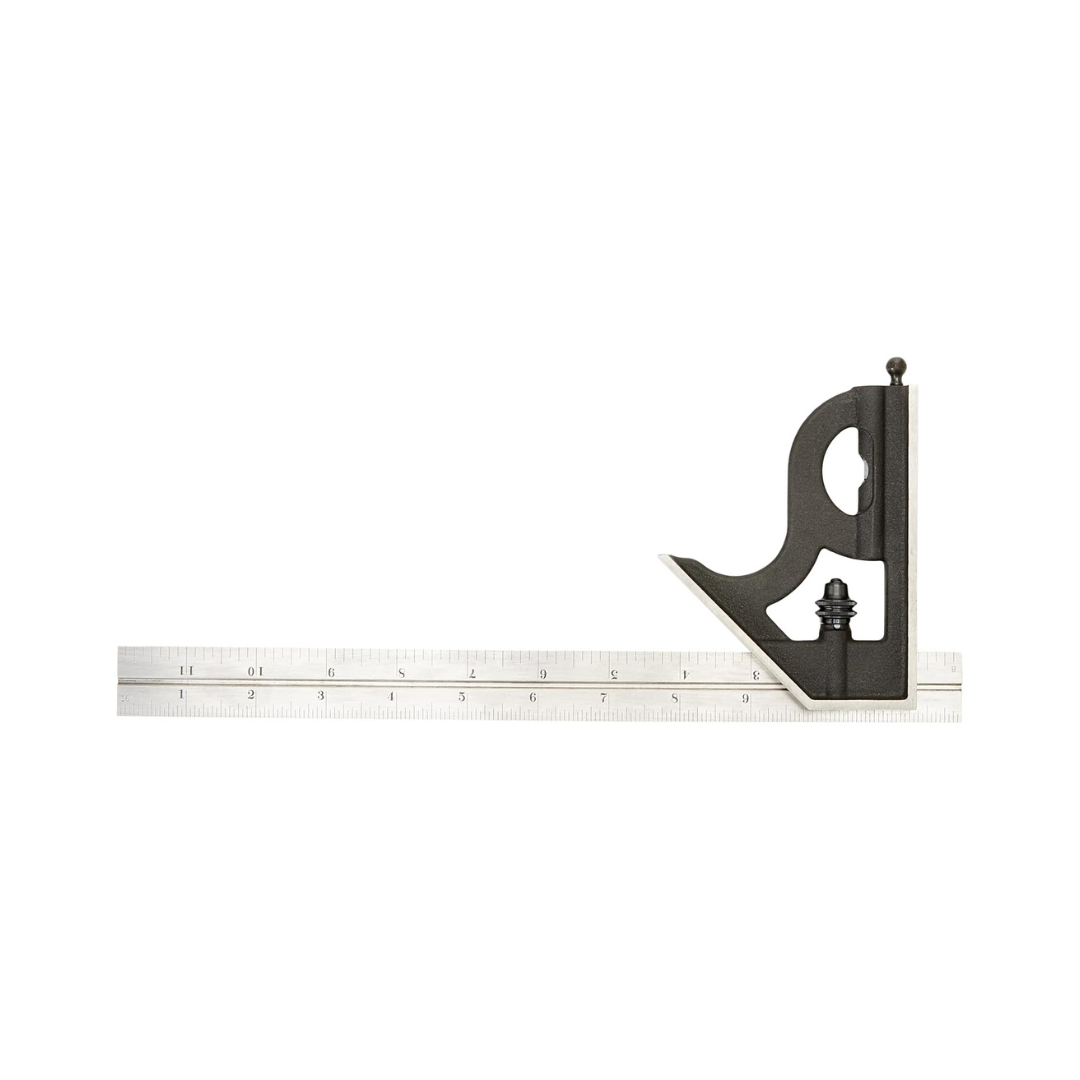
The first is the steel ruler (1), which helps measure items and sets the square’s different surfaces to a specific size. The second part is the slide handle (2), through which the ruler slides and clamps in place.
The thumb screw (3) locks the slide in place, allowing the user to repeat measurements and marks. Some include a scribe in the handle (4), which can be removed and used to make fine, accurate marks against the tool’s straight edge (5).
Combination squares have multiple uses. They can be used for framing, where they can square lumber, mark 45 degrees, and help with layout. They can also be used for metal work, making accurate marks for cutting or drilling. They can also be used for laying out trim around window and door jambs. They’re also helpful for measuring the depth of dados or grooves and then transferring those measurements to create corresponding rabbets or tongues.
How to Pick the Right Combination Square
Buying high-quality combination squares matters. Light-duty models are susceptible to bending or shifting with repeated use, meaning they’ll no longer strike square lines for layout. The heavier the combination square, the better the quality, and it’s a good idea to buy the best combination square you can afford.
Silva mostly uses a 6” combo square or 12” combo square. He looks for brands that are sturdy and not flimsy. Forged steel and cast iron are the strongest materials used.
What to look for:
- A blade with easy-to-read markings.
- A pleasantly hefty square head, preferably cast iron or forged steel.
- A knurled adjustment knob to lock or loosen the blade.
- A scratch awl at least 1 inch long that fits snugly into the head.
- Nicely machined edges free of pitting or paint.
Our Top Combination Square Picks
Here are some of the top combination squares on the market.
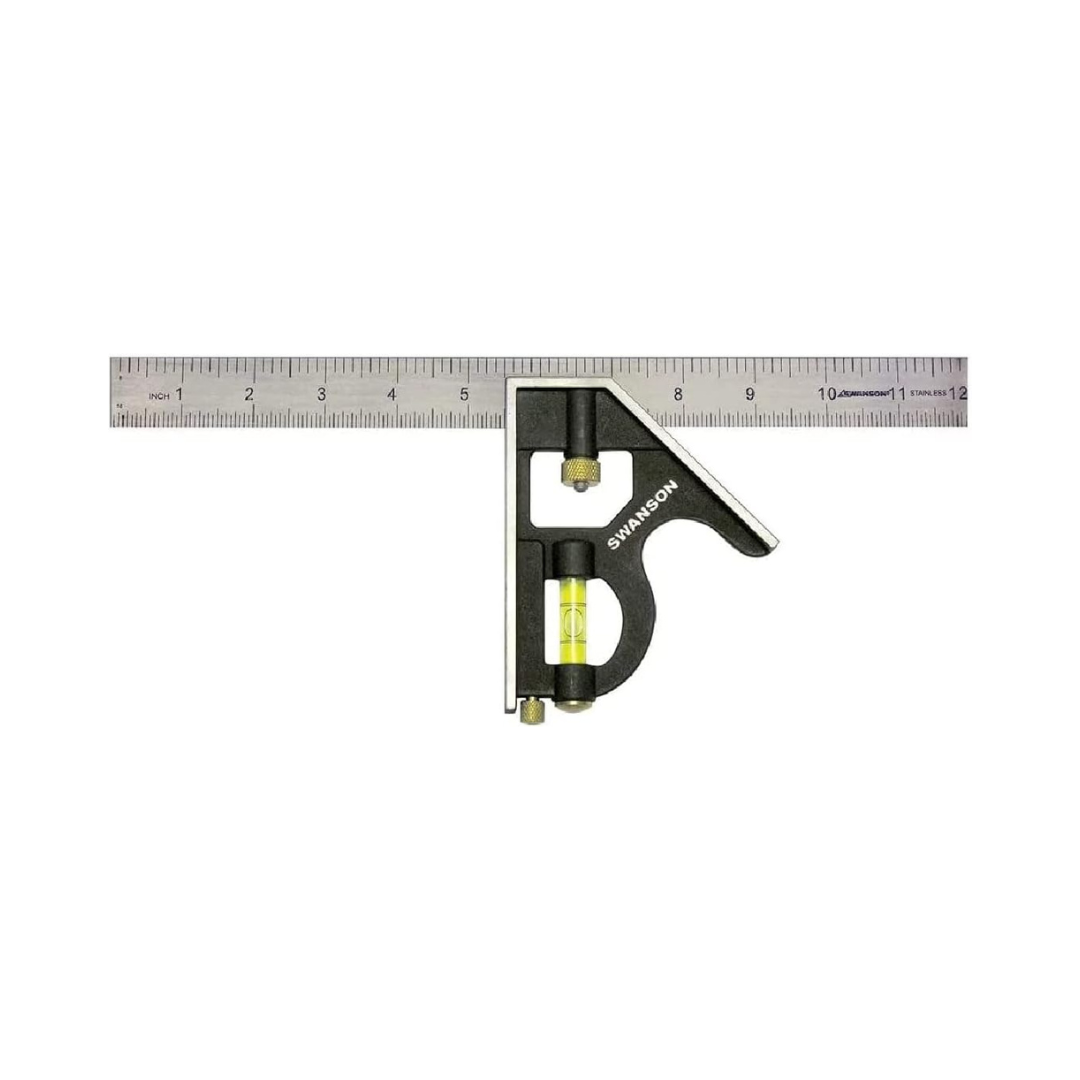
Swanson Tool Co TC132 12-Inch Combo Square
- $13.71
Prices taken at time of publishing.
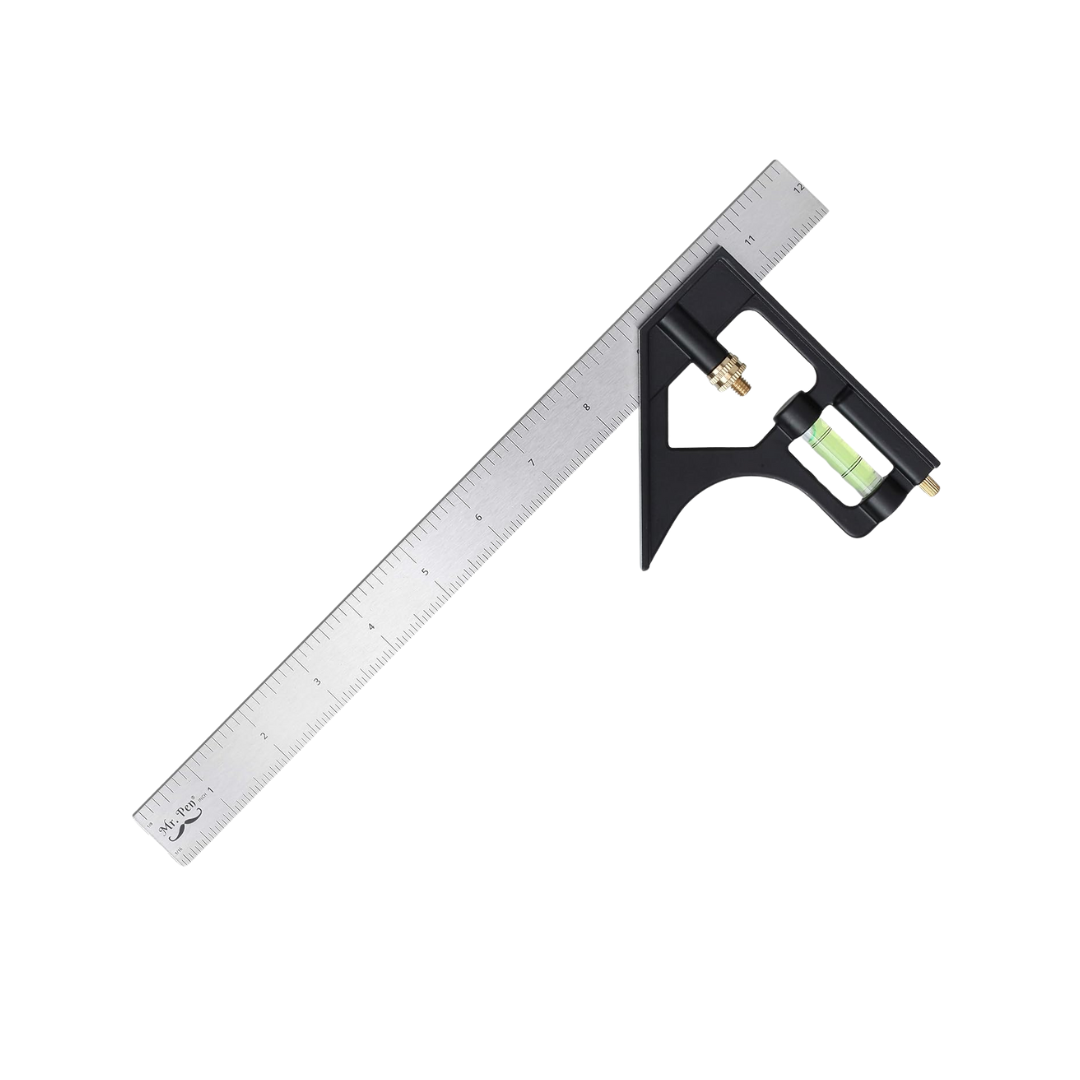
Mr. Pen Combination Square
- $8.95
Prices taken at time of publishing.
Starrett Steel Combination Square
- $110.11
- $123.83
- 11% off
Prices taken at time of publishing.
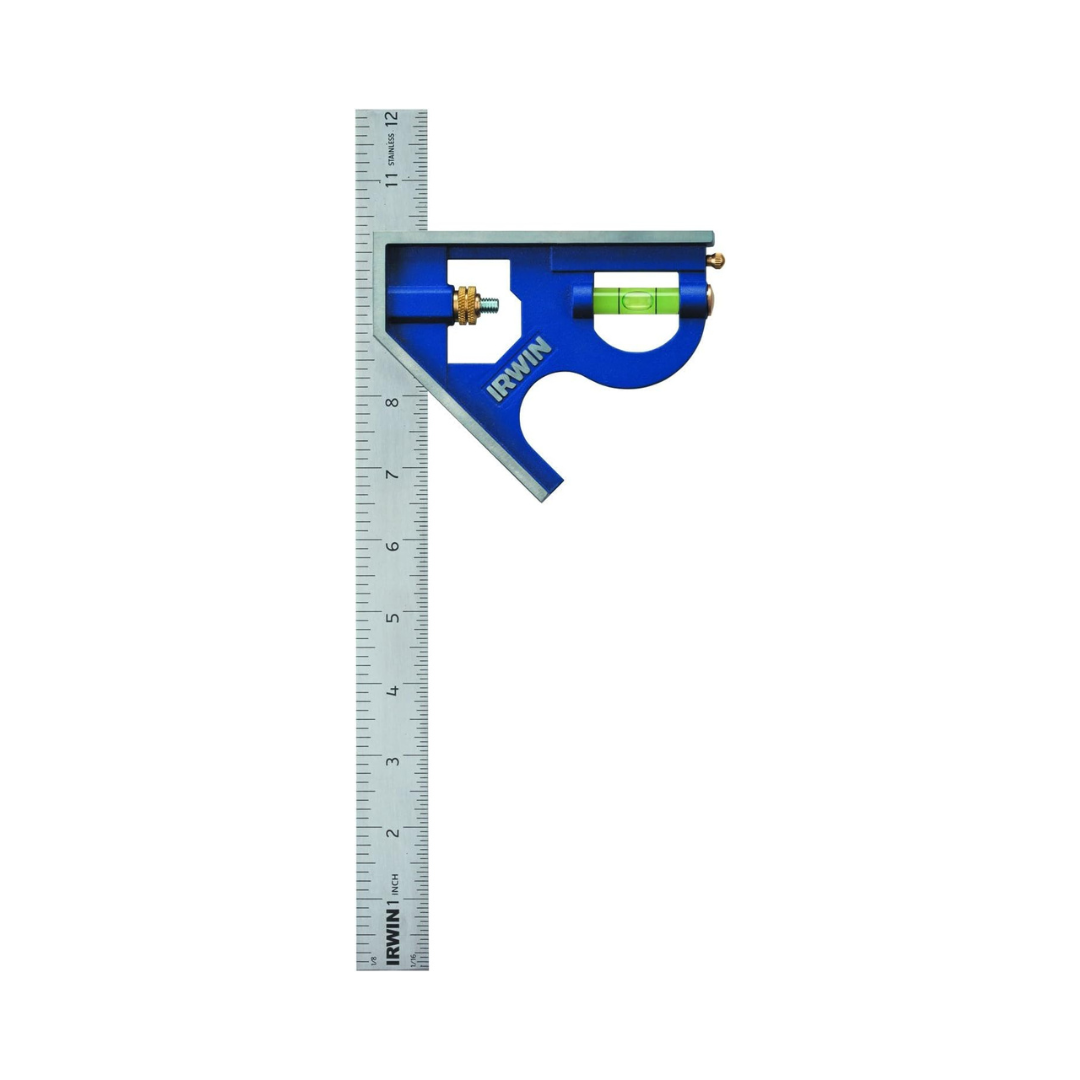
IRWIN Combination Square
- $12.99
Prices taken at time of publishing.
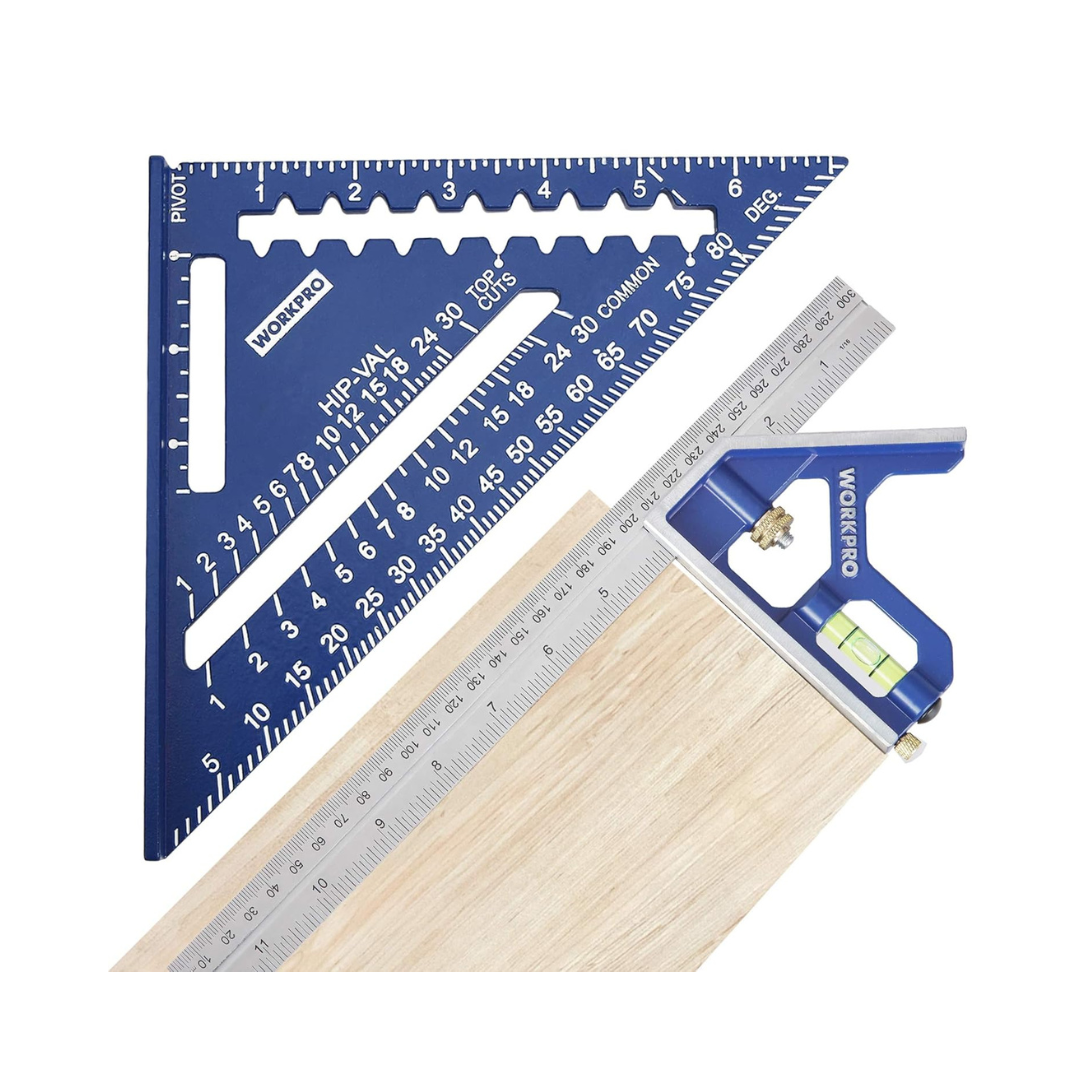
WORKPRO Aluminum Alloy Carpenter Square
- $22.99
Prices taken at time of publishing.
Techniques for Using a Combination Square
Follow these tips from the This Old House team to learn the best techniques for using a combination square.
Check It for True
With a tool prized for its accuracy, it’s worth checking every now and then to make sure yours is true.
Extend the blade as far as possible, grooved side up, through the 90-degree face of the head, and hook the square against the straight edge of a board. Scribe a line along the blade. Now flip the tool over, groove down, and line up the same edge of the blade with your mark. If they’re parallel, the tool is square. If not, it needs to be repaired or replaced.
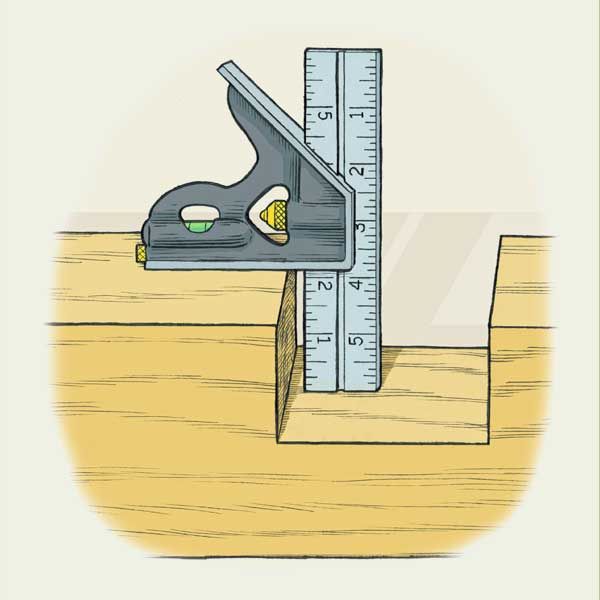
Mark and Check Notches
Set the blade to the notch’s depth. Hug the square to the board and, holding a pencil against the end of the blade, drag both along the board to mark the base of the notch. Use the blade’s long edges to mark the width. To check the depth of your cuts, position the square as shown, bottom out the blade, tighten the knob, and read the marking.
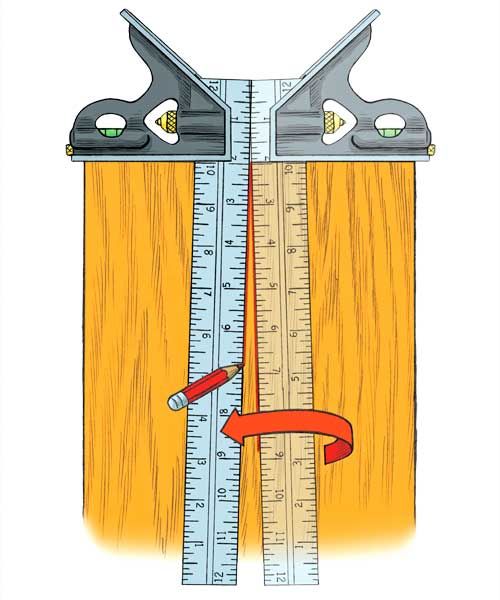
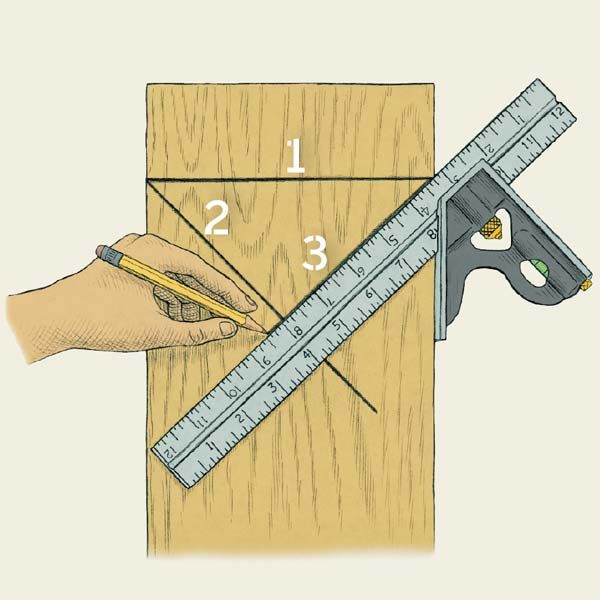
Find the Centerline
Here’s a quick way to find the center of a board. Draw a line across the board 90 degrees to both edges. Then use the 45-degree face to draw a line from the point where the 90-degree line meets an edge of the board.
Flip the square over to the board’s other edge and draw another diagonal, as shown, from the opposite end of the 90-degree line. Where the diagonals intersect is the centerline.
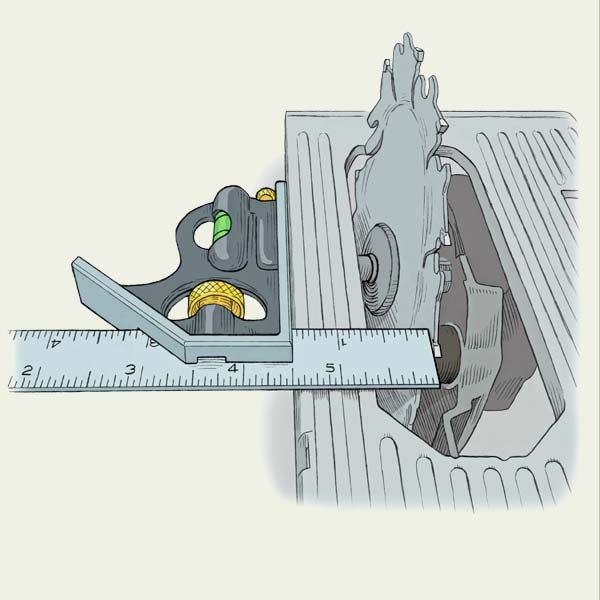
Cut Sheet Goods Accurately
Unplug your circular saw, remove its battery, and flip it upside down. Place the square’s 90-degree face against the narrow edge of the shoe and extend the square’s blade until it touches one tooth, as shown, then tighten the knob. Read the marking and clamp a straightedge at that distance from your cutline on the keeper side. Cut away.